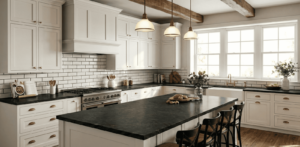
Assembling kitchen cabinets can feel overwhelming, especially if you’re handling it on your own. However, with some preparation, clear instructions, and a bit of patience, it can become a manageable and rewarding DIY project. The key to a successful cabinet assembly is staying organized, understanding the process, and ensuring you have the necessary tools.
This blog will provide essential tips and tricks for assembling RTA cabinets, ensuring you do it correctly and easily.
Required Tools
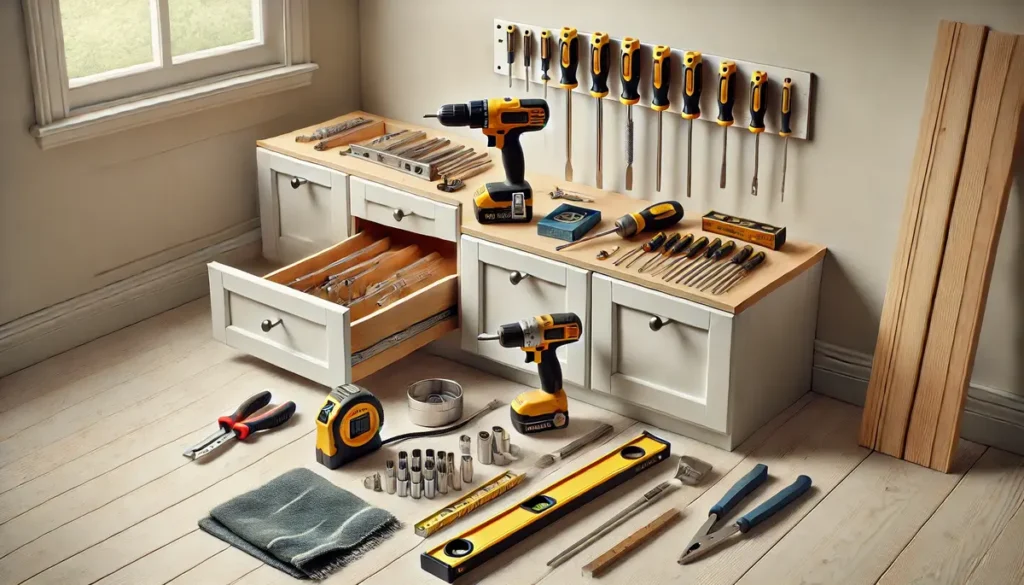
A well-equipped toolkit can significantly simplify the process and ensure a successful installation. Here’s a list of the essential tools you’ll need:
- Screwdriver (Phillips and Flathead): Used for tightening screws and securing cabinet parts. Both types may be required depending on the cabinet design.
- Damp cloth: Useful for wiping down surfaces before assembly to remove dust, dirt, or debris, ensuring a clean, smooth finish when securing pieces.
- Drill and drill bits: This makes the process quicker when installing screws and hardware, especially in hard materials.
- Measuring tape: Ensures precise measurements for spacing and alignment of cabinets.
- Level: Helps to make sure your cabinets are installed straight and even, preventing any tilts or gaps.
- Clamps: Holds cabinet parts in place while you assemble them, making the job easier and more accurate.
- Rubber mallet: Gently taps pieces together without causing damage to the wood or materials
- Stud finder: Locates studs in the wall to ensure that cabinets are mounted securely.
- Pencil: For marking measurements or placement points.
What are the Common Parts of RTA Kitchen Cabinets
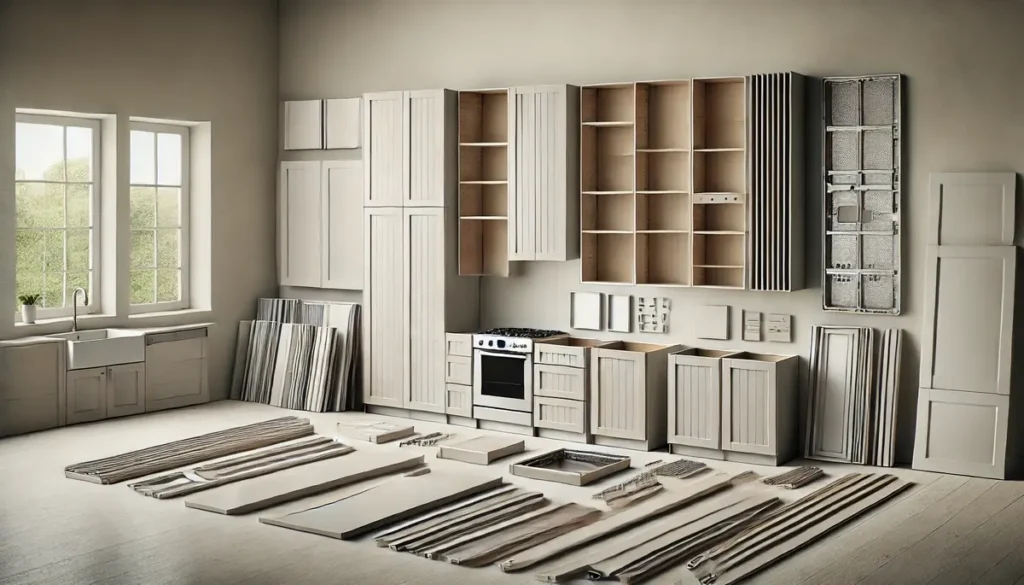
Ready-to-assemble (RTA) kitchen cabinets are ideal for homeowners seeking a cost-effective and customizable solution for their kitchen remodel. The concept revolves around modular components that are designed for easy assembly, allowing homeowners to create a tailored kitchen space without the need for extensive labor or high costs. RTA kitchen cabinets consist of the following components:
- Base Cabinet: Located at the bottom of the kitchen, base cabinets serve as the foundation for your countertop and provide essential storage space. They typically house pots, pans, and other kitchen essentials. Base cabinets usually come with a toe kick, which allows for comfortable standing while working at the counter.
- Wall Cabinet: These cabinets are mounted above the countertops and provide additional storage for dishes, spices, and small appliances. Wall cabinets help maximize vertical space in the kitchen, keeping frequently used items within easy reach while maintaining a clean, uncluttered countertop.
- Tall or High Cabinet: Often referred to as pantry cabinets, these cabinets are designed to extend from the floor to the ceiling. They offer substantial storage capacity for canned goods, dry foods, or cleaning supplies. Tall cabinets can be placed next to base or wall cabinets to create a cohesive look and provide easy access to bulk storage.
How to Install RTA Kitchen Cabinets?
Many people wonder how to assemble RTA kitchen cabinets. Installing RTA kitchen cabinets can be a satisfying DIY project that improves your kitchen’s functionality and appearance. With thorough preparation and attention to detail, you can achieve professional-looking results.
Step 1: Prepare for Delivery
Proper preparation for delivery ensures a smooth installation process. First, create a designated area where the boxes and components can be easily loaded in your kitchen or another room. This space should be clear of obstacles to facilitate unloading.
Upon delivery, inspect the boxes for any visible damage. Take photos of damaged parts and note missing pieces on the delivery receipt. This documentation will be crucial if you need to file a claim with the manufacturer. Also, ask the manufacturer how long you must report damaged or missing parts after accepting delivery.
Step 2: Identifying Parts
Carefully open each box to avoid damaging the contents. Once opened, lay out the parts in a way that makes them easy to see. Next, familiarize yourself with the right and left sides of the cabinets and look for markings or guides in the assembly instructions to avoid confusion. Additionally, identify the bottom edge of the cabinet sides, as this area typically has specific features, such as grooves or pre-drilled holes, that attach the cabinet to the base or secure it to the wall.
Step 3: Organize All Components
Sort your cabinets by type, grouping the upper and lower cabinets separately. This organization will help you quickly find the parts and reduce assembly time. Watch instructional videos provided by the manufacturer, if any. These videos can offer valuable tips and demonstrate the specific assembly techniques for your cabinet model. Lay out all parts and hardware for each cabinet on a work surface to keep everything organized. This way, you will easily locate the components needed throughout the assembly.
Step 4: Gluing Process
To begin the gluing process, lay both side panels flat, with the holes facing upward and the back edges touching each other. This positioning will help ensure a secure connection when the parts are joined. Next, apply a small amount of wood glue into each dowel hole on both side panels. Be careful not to put glue in the through-holes, as this can cause issues during assembly.
Step 5: Install the Bottom
When installing the bottom board, line up the 1/4-inch groove on the bottom board with the matching groove on the left side panel. Next, insert the six dowels from the bottom board into the six dowel holes on the left side. Gently tap the bottom board’s edge with a rubber mallet to ensure a snug fit of the dowels into the holes. Once you’ve done this, wipe away any excess glue that may have squeezed out during the process using a damp cloth to keep the assembly neat and clean.
Step 6: Install Support Rails
Insert two support rails into the four dowel holes located along the top edge of the left side panel. Place the two extra support rails in the dowel openings at the back of the left side, behind the 1/4-inch groove. Use a rubber mallet to tap each support rail in place gently.
Step 7: Insert the Back Panel
To install the back panel, fit it into the 1/4-inch groove on the bottom panel and slide the panel down to fit into the groove on the left side.
Step 8: Attach the Right Side
Flip the right side so that its dowel holes align with the dowels in the bottom panel and support rails. Make sure the back panel fits into the groove on the right side. Move quickly to prevent the glue from dripping, and then gently use a rubber mallet to tap the right side. Use a damp cloth to wipe away any excess adhesive. To keep the cabinet secure, place the given lag screws into all seven holes on both sides.
Step 9: Attach the Legs
Insert the four legs into the pre-drilled holes on the bottom panel. Use the screws provided, i.e., four screws for each leg, to secure them in place.
Step 10: Assemble and Install the Drawer
Attach two brackets to the back of the drawer using the six screws provided. Now, attach two brackets to the front of the drawer using the four included screws. Place the drawer sides onto the brackets and slide them into position. Fit the drawer bottom into the grooves on the sides. Click the drawer front into the drawer sides. Use the screws provided to fasten the drawer slides to the bottom and back.
Secure the left drawer glide to the inside of the left side and the right glide to the right side at your desired height, using two screws per glide. Finally, place the drawer on the glides and push it in until it clicks into place.
Step 11: Install the Door
Place the door on a flat surface with the two hinge holes pointing upwards. Insert the hinge into each hole and press the hinge cover down to secure it. Attach two hinge plates to the pre-drilled holes on the left side. Now, align the hinge arms with the hinge plates and push them toward the back until you hear a click. In the end, peel and stick two rubber bumpers onto the inside corners of the door.
Additional Tips
You might wonder, “How hard is it to assemble RTA cabinets?” While the task can initially seem challenging, it is manageable with the right approach.
Here are additional tips to make the process easier:
- Label parts as you go to prevent confusion during assembly.
- Use a sturdy workbench or table for assembly to provide ample space and a comfortable height.
- Check that all screws, brackets, and hinges are included and compatible with your cabinet design before starting.
- Review the entire instruction manual to familiarize yourself with the process.
- Keep extra wood glue and screws nearby in case of any mishaps during assembly.
- Regularly clean your workspace to avoid losing small parts and to maintain a safe environment.
Conclusion
Putting together RTA kitchen cabinets can be a satisfying DIY endeavor that improves your kitchen’s functionality and appearance. Although it might initially feel daunting, adhering to the advice and steps provided in this blog can simplify the process and make it more manageable. Keep things organized, set up your workspace, and take time with each stage.
You can achieve a polished outcome that reflects your style with patience and attention to detail. By taking on this project, you will save money and experience a sense of achievement as you create a beautiful kitchen area customized to your requirements.